运用sinopia 搭建私有npm服务器的教程
简介
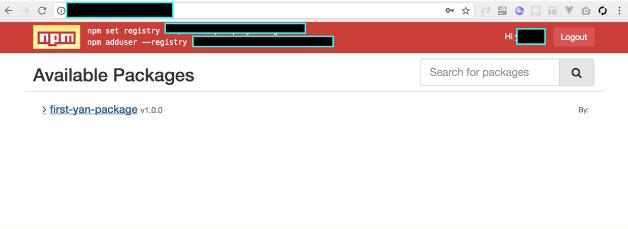
结果展现
运用 sinopia 的益处是,node系的工程师,内部协作时,运用自有 npm 包,会非常利便;另外,sinopia,会缓存已经下载过的包,可以在相当程度上,加快 npm install 相干下令的施行。
工作中,的确有需要用到 sinopia 来作为私有 npm 服务器的场景。本来不断在本人电脑上开启 sinopia。这样做最大的题目是,sinopia 后台不断开着,会越来越耗费资源,电脑最后会变得很卡。偶然,还会由于忘怀开启或关闭 sinopia,带来各种不便利。
今天我试着直接在树莓派上搭建一个 sinopia 服务。终究实现的结果较为完备,根本知足需要了。包含会员权限治理,外网运用自定义域名访问,sinopia服务开机自启等特性。
注意:下列 shell 下令,默许在树莓派的shell中施行,而不是在本机电脑上。
安装最新长期支撑版 node 环境
树莓派自带的 node 环境是 v4.8.2,有须要晋级下。
安装 nvm
倡议安装 nvm,以利便治理多个版本的 node 环境。
# 安装 nvm
wget -qO- https://raw.githubusercontent.com/creationix/nvm/v0.33.6/install.sh | bash

# 重新启动shell

# 验证 nvm 安装
command -v nvm
运用 nvm 安装最新长期支撑版 node 环境
# 安装 Node
nvm install --lts

#验证安装 --> v8.9.1
node -v
安装和配置 sinopia
安装 sinopia
# 安装
npm install -g sinopia

# 验证是否安装成功 --> 这一步会输出主动生成的配置文件途径等信息。
sinopia
解决端口 4873 占用题目
sinopia 启动时,默许运用 4873端口,可能会碰到端口冲突题目。
# 安装 lsof 下令
sudo apt-get update
sudo apt-get install lsof

# 查看端口占用进程 PID
lsof -i :4873

# 杀死占用 4873 端口的进程。4649,要换为现实的 PID。
kill -9 4649
注册一个默许账户
为了提高平安性,我们稍后会禁用 sinopia 的会员注册功能,所以先注册一个默许的 sinopia 账户。需要在目前 shell 中施行 sinopia 下令开启服务之后,再从新打开一个 shell 施行:
npm set registry http://localhost:4873/
npm adduser --registry http://localhost:4873/
会员名,密码,邮箱等,要记牢,恰当设置的复杂点。
### 晋级安装 vim
感觉树莓派自带的 vim 不太好使了,我也顺便晋级了下。
```
# 安装 vim
sudo apt-get update
sudo apt-get install vim
# 配置支撑vim中鼠标右键复制
vim ~/.vimrc
```
在 .vimrc 此文件中添加如下一行:
shell set mouse=v
配置 sinopia
配置文件途径可以在施行 sinopia 下令时,从其输出中查看,个别应是 /home/pi/.config/sinopia/config.yaml
基于我的运用运用经验和文档注明,主要配置了下列内容:
max_users: -1 :禁用注册。
*npmjs: url: https://registry.npm.taobao.org* : 设置 npm 镜像为淘宝源,一来可以加快 npm 公共包的安装,二来借助淘宝源的只读特性,以免误操纵发表私有 npm 包到外网上。
access: $authenticated:制止匿名会员访问。配置后,未登录会员看不到 sinopia 上私有包的任何信息。
max_body_size: '200mb':这样设置,会提高安装超级 npm 包的成功率,比方 react-native 。
完备配置内容如下。要是你不是在树莓派上配置,请把 /home/pi 替代为本人真实的会员途径名。
#
# This is the default config file. It allows all users to do anything,
# so don't use it on production systems.
#
# Look here for more config file examples:
# https://github.com/rlidwka/sinopia/tree/master/conf
#

# path to a directory with all packages
storage: /home/pi/.local/share/sinopia/storage

auth:
 htpasswd:
  file: ./htpasswd
  # Maximum amount of users allowed to register, defaults to "+inf".
  # You can set this to -1 to disable registration.
  max_users: -1

# a list of other known repositories we can talk to

uplinks:
 npmjs:
  url: https://registry.npm.taobao.org

packages:
 '@*/*':
  # scoped packages
  access: $authenticated
  publish: $authenticated

 '*':
  # allow all users (including non-authenticated users) to read and
  # publish all packages
  #
  # you can specify usernames/groupnames (depending on your auth plugin)
  # and three keywords: "$all", "$anonymous", "$authenticated"
  access: $authenticated

  # allow all known users to publish packages
  # (anyone can register by default, remember?)
  publish: $authenticated

  # if package is not available locally, proxy requests to 'npmjs' registry
  proxy: npmjs

# log settings
logs:
 - {type: stdout, format: pretty, level: http}
 #- {type: file, path: sinopia.log, level: info}

max_body_size: '200mb'
可以在当地编辑器中修改好配置,然后直接复制到树莓派上:
# 打开配置文件
vim /home/pi/.config/sinopia/config.yaml
运用粘贴下令。直接粘贴,格局会错乱。
:set paste
i
# 右键粘贴即可。
配置frpc 长途访问
对于 frp 的配置题目,详见:【小技巧解决大题目】运用 frp 冲破阿里云主机无弹性公网 IP 不能用作 Web 服务器的限定。此处只贴出 frpc 的要害配置变更:
[web-sinopia]
type = http
local_port = 4873
subdomain = sinopia
运用 Systemd 实现 sinopia 服务开机自启
树莓派,默许是带有 Systemd 的,直接运用即可:
sudo vim /usr/lib/systemd/system/sinopia.service
sinopia.service 具体内容如下,其中/home/pi/.config/sinopia/config.yaml 要替代为本人的 config.yaml 地址:
[Unit]
DescrIPtion=sinopia
After=network.target

[Service]
TimeoutStartSec=30
ExecStart=/home/pi/.nvm/versions/node/v8.9.1/bin/sinopia /home/pi/.config/sinopia/config.yaml
ExecStop=/bin/kill $MAINPID
Restart=on-failure
RestartSec=42s

[Install]
WantedBy=multi-user.target
启动 sinopia 并设置开机启动:
systemctl enable sinopia
systemctl start sinopia
systemctl status sinopia
其他可能有用的下令
# 禁用服务
systemctl disable sinopia

# 从新启动服务
systemctl restart sinopia
在另一台电脑上运用 sinopia 私有 npm 服务器功能
假定,终究的 sinopia 服务器的外网地址是: *http://sinopia.example.com*
真正想运用,需要在终端中配置下:
npm set registry http://sinopia.example.com
npm adduser --registry http://sinopia.example.com
npm login
配置结束后,你可以试着发表一个私有 npm 包:
# 在某个文件夹初始化一个新的 npm 包
npm init

# 发表到私有 sinopia 服务器:
npm publish
发表成功后,在阅读器中登录 *http://sinopia.example.com*,刷新页面,应当就能看到本人刚发表的那个包了。
注意,其他会员在运用私有库上的包时,也应当先登录,否则会报错:
unregistered users are not allowed to access package
以上这篇运用sinopia 搭建私有npm服务器的教程就是小编分享给大家的全部内容了,但愿能给大家一个参考,也但愿大家多多支撑我们。
热门标签:dede模板 / destoon模板 / dedecms模版 / 织梦模板